Slow sites suck. Just ask anyone. If I’m trying to load a web page and have to wait for more than a second or two, I’m out of there.
That’s why I will show you how to make your WordPress site significantly faster by implementing W3 Total Cache and CloudFlare. With my optimal settings, your site will literally fly, I promise.
But why do you need a fast website, I hear you ask.
There are multiple reasons, and they are best seen in the light of the following information:
- Over 60% of search queries are carried out on a mobile device as of 2016. This is probably now higher.
- Page speed is now a Google Ranking Factor.
- Conversion Rate - A 1-second increase in page loading time can decrease your conversion rate by up to 7 percent.
Google did some research into the relationship between page load time and bounce rate and found that:
- The average time it takes to fully load a mobile landing page was around 15 seconds in February 2018, an improvement of 7 seconds from 2017.
- 53% of mobile site visits leave a page that takes longer than three seconds to load.
Here are the full stats from Google:

You get the point.
This can hurt a company’s bottom line, with less traffic, resulting in fewer sales or advertising revenue.
How will W3 Total Cache and CloudFlare improve your page speed?
The W3 Total Cache WordPress Plugin boosts your site speed by caching the dynamically rendered portions of your page into plain HTML. This means subsequent visitors will see a pre-rendered HTML web page version instead of being created on demand. It integrates seamlessly with many content delivery networks, including the CloudFlare CDN, for increased site performance.
In addition to caching the HTML of the page, W3 Total Cache can minify, compress and enable browser caching of your pages to reduce bandwidth usage by up to 80%.
CloudFlare increases your site speed by using a CDN to cache your static files at multiple servers worldwide instead of just one server. Because the files are served closer to your visitors, they load significantly faster.
Another option (which may be suitable) for CloudFlare users is to use Page Rules to cache the HTML of your page and server those via the CDN.
There are many other website optimization benefits to using CloudFlare, including Javascript optimization, Image Optimization, DDoS protection, HTTP/2, Browser, Argo Smart Routing, and Tiered Caching.
I’ve kept this tutorial simple, but there is a lot to get through. You should allow between 30 minutes and an hour to set everything up. It will be worth it, I promise.
This tutorial was last updated on 26th November 2022 and includes new screenshots.
Part 1. How to Install the W3 Total Cache Plugin
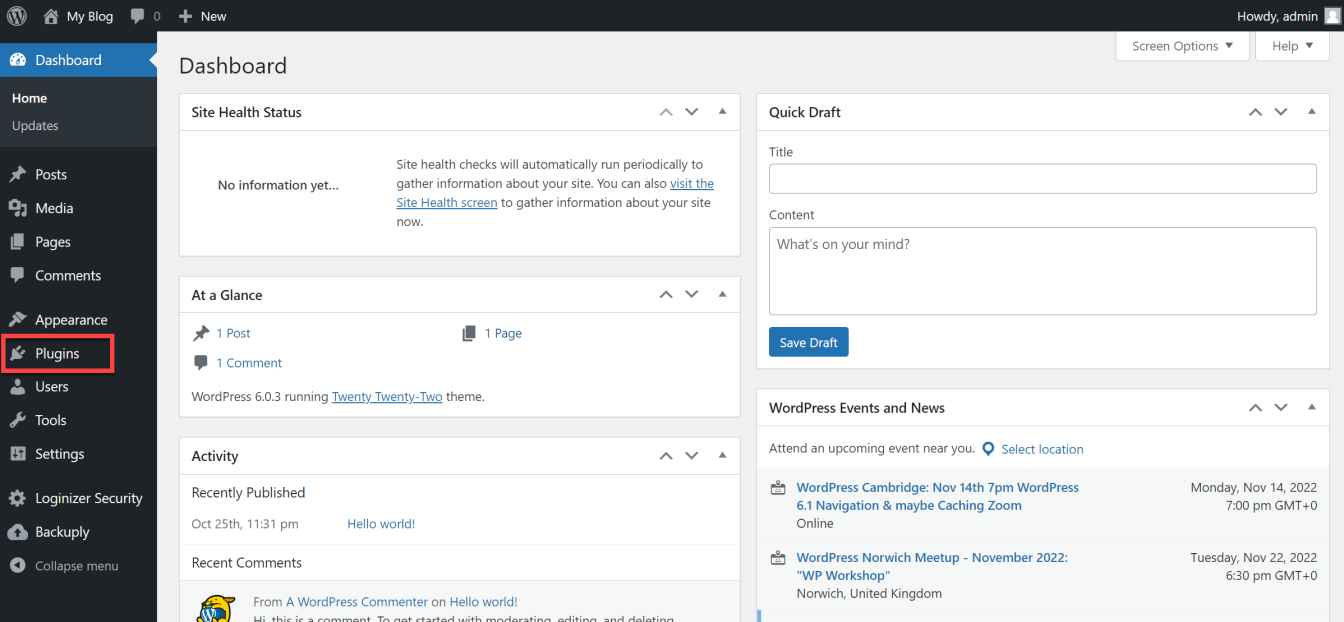
The plugin is incompatible with other caching plugins, so ensure these have all been uninstalled before proceeding further.
In the search box, type “W3 Total Cache”. The list of plugins will automatically update to show the W3 Total Cache Plugin as the first entry.

Click the “Install Now” button. After a few seconds, the ‘Install Now’ button will change to ‘Activate’.
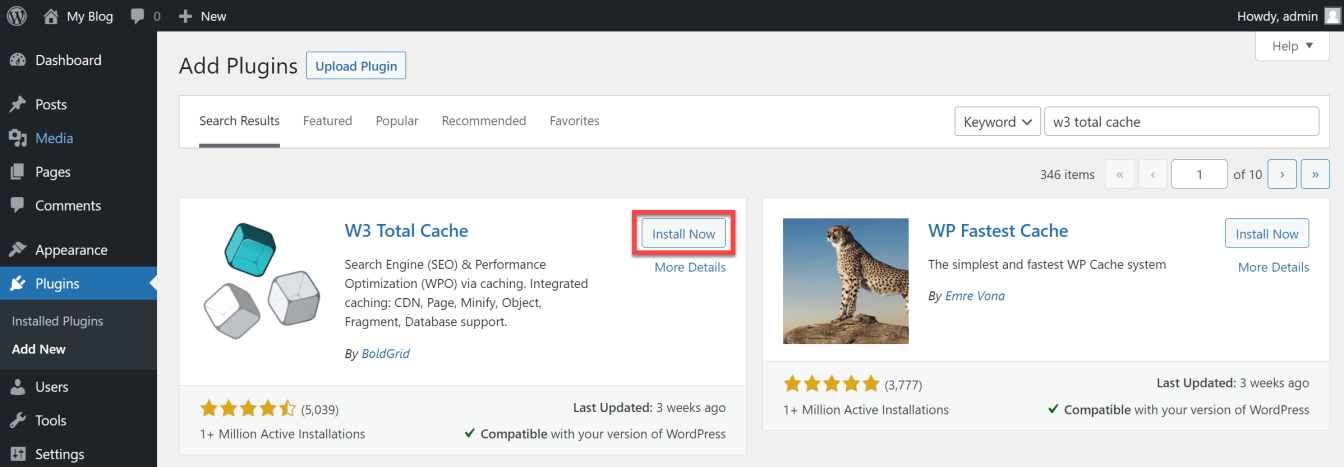
Click the ‘Activate’ button to activate the W3 Total Cache. Once you have done this, you will be ready for Part 2 of this tutorial.

Part 2. How to Configure the Best W3 Total Cache Settings
It was quite a task to configure W3 Total Cache with optimized settings properly.
Now, you can configure W3 Total Cache with the best settings in just a few minutes by using the W3 Total Cache Setup Guide.
Let us show you how right now.
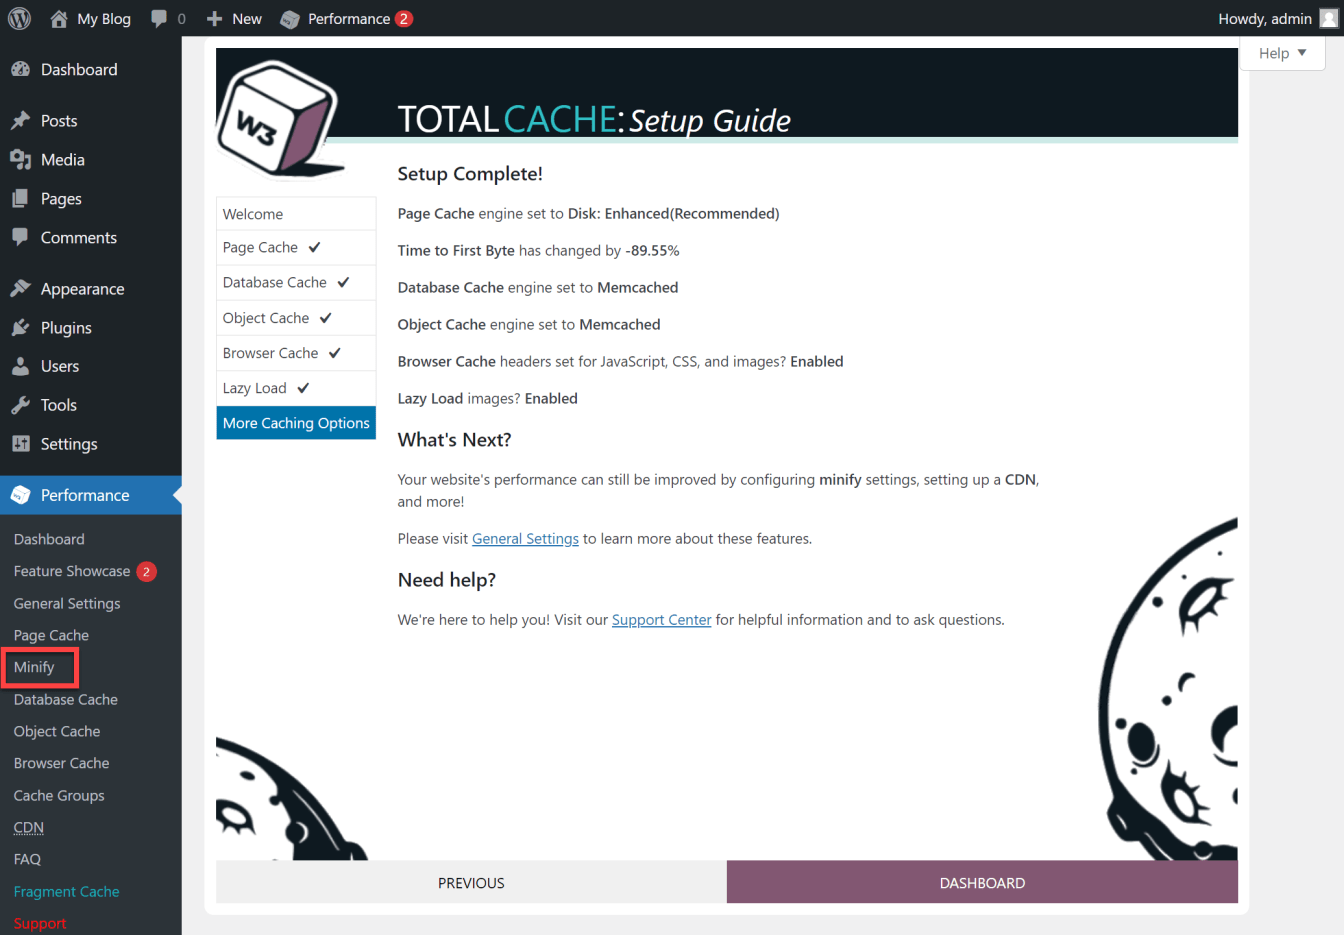
The company behind the plugin lists all the settings under the “Performance” option in the WordPress menu.
The performance link is in both the left-hand and top menus.

The plugin won’t let you access any settings before you either accept or decline their request to transfer data to them.

W3 Total Cache now has a guided setup that will automatically compare different settings by running benchmark tests based on your available server settings and allowing you to pick the best.
Note: You should follow the recommendations given by the tests. The test results may vary depending on the complexity of your website.
Start the process by clicking “Next”.

Page cache is pretty much the most important feature of W3 Total Cache. Even if you just use this, you will see massive gains.
Page caching takes a copy of the page after it has been created so subsequent copies of the page can be retrieved using that copy instead of running all the PHP scripts and database queries again.
In addition to significantly improving page speed, it also reduces the load on your server, allowing you to serve more visitors on a cheaper plan. I highly recommend SSD hosting with WordPress and W3 Total Cache.
You can read my commentary on the different Caching Methods here.
The first step is to run a page cache test to determine the best page cache settings.
Click “Test Page Cache”.

Select the storage engine that performed the fastest. In this tutorial, that was the recommended “Disk:Enhanced” option.
Then click “Next”.

The database cache will store the results of any database queries to increase the speed of your website by allowing your server to retrieve the data faster. Memory-based caching, such as Memcached, is significantly faster than disk-based.
The first step is to run a Database cache test to determine the best Database cache settings.
Click “Test Database Cache”.

If you have Memcached installed, you should use that. Otherwise, W3 Total Cache recommends the following:
By default, this feature is disabled. We recommend using Redis or Memcached, otherwise leave this feature disabled as the server database engine may be faster than using disk caching.
Let’s follow their advice. If you have Memcached or Redis, select that. If not, select “None”.
From our tests with both A2 Hosting and TMDHosting, we found very little performance difference between “none” and Memcached. You shouldn’t worry if you don’t have it.
Then click “Next”.

By default, WordPress has a caching system as standard called Object Caching. Object Cache will store anything in cache utilizing this WordPress Caching API to reduce the number of calls needed to the database, thus speeding up your site.
The first step is to run a Database cache test to determine the best Object cache settings.
Click “Test Object Cache”.

Select the storage engine that performed the fastest. In this tutorial, that was the “Memcached” option, but you should choose the fastest available option.
Then click “Next”.

Browser Caching stores a copy of the webpage and any asset files (Stylesheets or JavaScript files) in the user’s browser so that if they revisit the page, it will load from their own browser cache rather than requesting the page again from the server.
The first step is to run a Browser cache test to determine the best Browser cache settings.
Click “Test Browser Cache”.

You should enable the browser cache.
Note: We’ll revisit this setting at the end of the tutorial to ensure that we exclude any pages that should not be cached, For example, shopping cart pages.
Then click “Next”.

Lazy Load Images will defer the loading of images on the page until the visitor scrolls down the page. This can reduce page load time and create a better user experience.
Select “Lazy Load Images”.
Then click “Next”.

You have now completed the installation of W3 Total Cache.
You may wish to consider some other settings, but these are optional. We’ll deal with these in Part 3 of this tutorial.

Part 3. Advanced W3 Total Cache Settings
For most sites, the default settings are perfectly fine.
Unless you have a specific reason or are just someone who loves looking at detail, you can happily proceed to part 4, where we set up CloudFlare.
Here is what we will cover in part 3:
- Minification: For HTML and CSS.
- Advanced Page Cache Settings: Caching of Category and Tag pages and excluding specific pages from being cached.
There are other Database, Object, and Browser cache settings, but we recommend leaving these at the default settings. We don’t recommend minifying Javascript files.
In the HTML & XML Section, tick the Enable, Inline CSS minification, and Line break removal checkboxes.

In the CSS Section, tick the checkbox to enable the CSS minify settings.
All other settings can be left as default.
Click “Save all Settings” to save.

Click the “Cache feeds: site, categories, tags, comments” checkbox.
Leave the other “General” settings as default.

Scroll down to the “Advanced” section. Here we want to exclude some pages from being cached. In this example, we will exclude some shopping cart pages in the directory “/cart/”.
To never cache the directory “/cart/” and all the subpages, we can use the following regular expression: “/cart*”.
Once complete, click “Save all settings” at the bottom of the page.

Part 4. How to set up CloudFlare
You will need to sign up to CloudFlare here.
If you already have a CloudFlare account, log in to your existing account.
Alternatively, click the ‘Get Started Free’ button to create an account

Enter your email address and a strong password. You will need to meet the password requirement.
Then click “Sign Up”.

Click “Get Started” to set up Cloudflare.

Enter Domain name - Enter your domain name in the box and click “Add Site.”

Click on the free plan to select it, then click “Continue”.

In my experience, CloudFlare is very good at importing your existing settings. At a minimum, you should have an “A” record pointing to your hosting server and a “CNAME” pointing to the www version of your domain.
You may have other CNAMEs, A records, and MX records that may relate to any subdomains, cPanel (or other control panels) login pages, and email settings.
Once you are happy with your settings, click “continue”.

To start receiving traffic through CloudFlare, you must update your Nameservers at your domain registrar.
CloudFlare will display your existing nameservers and the ones you need to change them to.
There will also be some simple instructions on how to do it, but if in doubt, you may need to get support from your registrar.
Once

The next screen will start Cloudflare’s quick start guide.
Click the “Get Started Button”.

Click the “Save” button to enable Automatic HTTPS rewrites to help prevent mixed content warnings.

Click the “Save” button to enable automatic redirects to HTTPS.

We have already configured minification within W3 Total Cache.
Keep these options unselected, and click “Save to Continue”.

Brotli compression will reduce the size of your web pages and other assets.
Ensure this is selected, and then click “Save”.

Click “Finish” to complete the Cloudflare Quick Start Guide.

It can take up to 24 hours for your nameservers to update.

Once everything is working, you will see a message saying the following:
Great news! Cloudflare is now protecting your site
If you have navigated away from the previous page, you will see this message by clicking on the Overview menu item.

There are a few more optimizations to make.
Firstly, under the Speed menu item, click “Optimization”.
At the top of the page, click the “Enable Argo” button.

We have already configured the browser cache from within W3 Total Cache. Therefore we need to tell Cloudflare to respect the existing headers.
Under the Caching Menu item, click “Configuration”.
Select “Respect existing headers” under the Browser Cache TTL option.

Part 5. How to Configure CloudFlare for WordPress
It is easy to configure CloudFlare with the W3 Total Cache CloudFlare extension. This links W3 Total Cache via the CloudFlare API, allowing you to configure almost all aspects of CloudFlare from within WordPress.
The CloudFlare extension can be found under the Extensions menu option under Performance.
Click Performance, then Extensions.

Click Activate: This activates the extension.
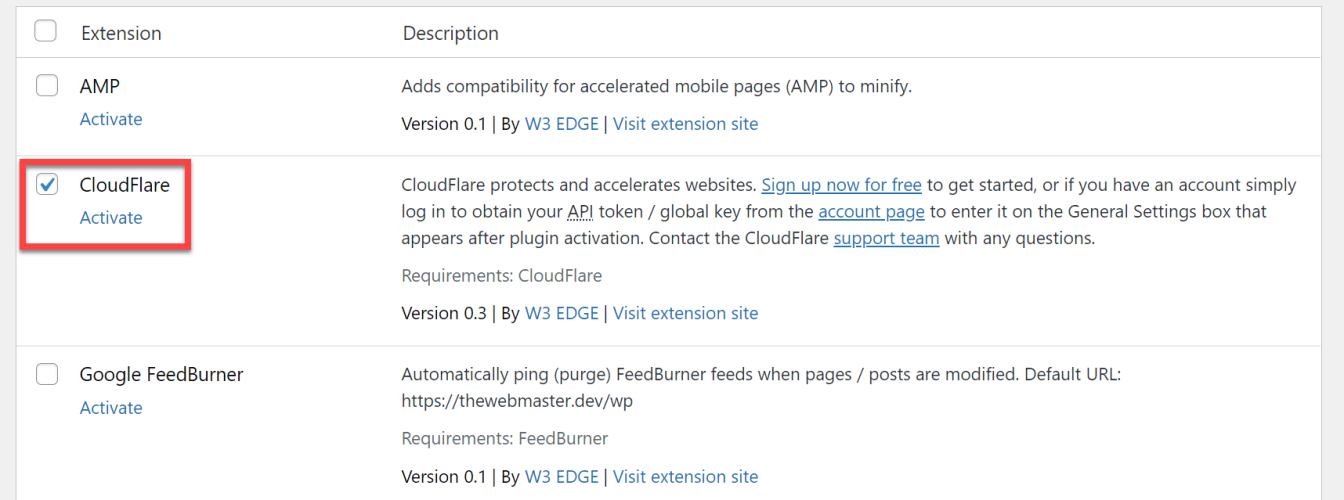
Click Settings: View all the CloudFlare extension settings.

- Click this link to go to your API management screen: https://dash.cloudflare.com/profile/api-tokens
- Click the “View” button next to the “Global API Key.”
- Enter your CloudFlare password to view your API keygen
- Copy your API key (keep it safe)

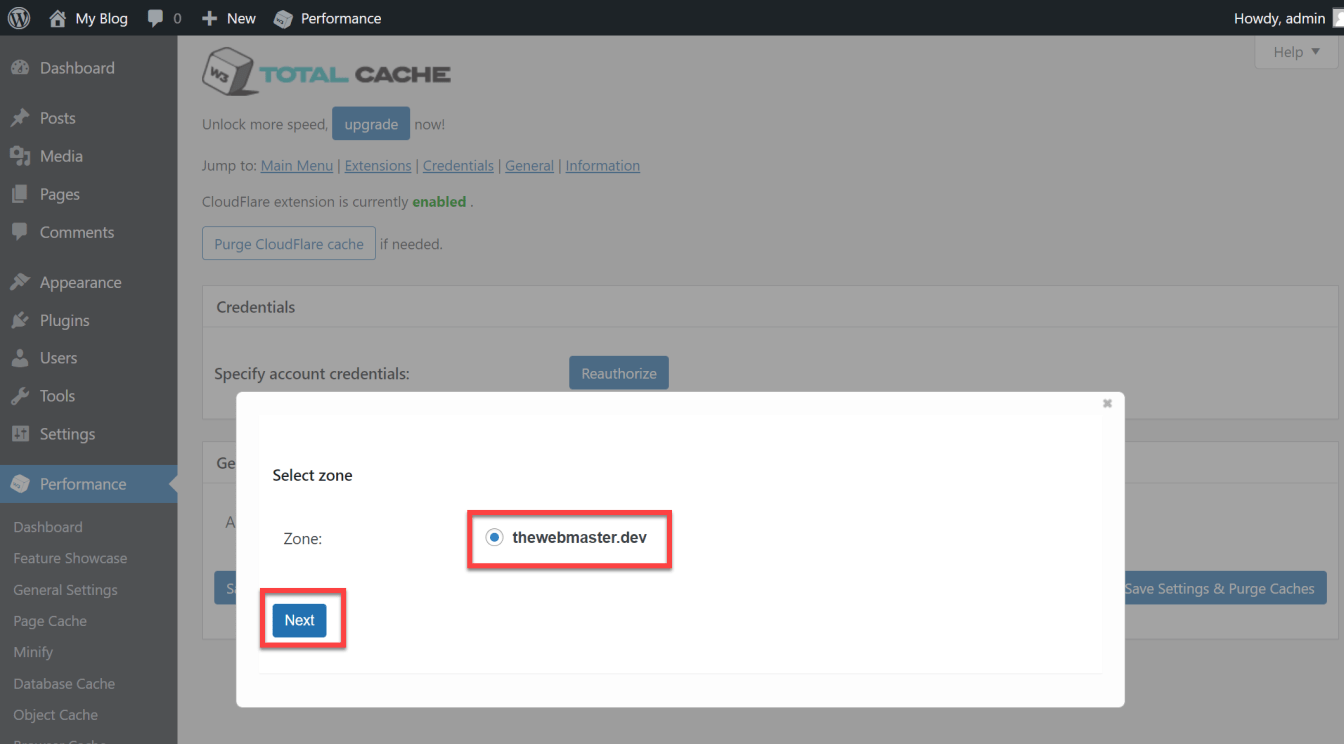
Select your domain from the list, and click “Next”.
All the plugin settings can be kept as the defaults. Previously, we made a few changes directly in Cloudflare, and the plugin picked those up.
Congratulations. You have successfully configured W3 Total Cache with CloudFlare
Hopefully, you managed to make it to the end. We promise it was worth it.
Your site will be faster, use fewer resources, and be protected against malicious bots, and your increased performance will even help with SEO.
We call that a win. Enjoy!
Frequently Asked Questions
What are the different types of WordPress Caching?
Page Cache — If you use a CMS, such as WordPress, whenever a page is viewed, the server has first to query the database and run scripts to understand what form it should take. Page Caching stores a copy of the finished page so it can be retrieved without having first to do all this work for subsequent loads.
Database Cache — This stores the results of any database queries, making retrieving subsequent duplicate queries faster.
Fragment Cache — A page can be made up of various parts (i.e., Main Content, Sidebar, Footer, etc.). Fragment Cache works like Page Cache but can store and retrieve each section separately.
Object Cache — This stores any calculations made by the WordPress API into the cache.
Browser Cache — This places a copy of the webpage in the Users Browser Cache. When that user revisits the same page using the same browser, it will be loaded from the cache stored on their computer rather than querying the web server.
What are the different caching methods?
Shared Servers:
- Disk: Basic - This method will invoke a PHP script to serve the cached page.
- Disk: Enhanced - This method will modify the .htaccess file to direct Apache to a static Cached version of the page, so it is much faster and recommended.
If your website slows due to Disk: Enhanced for whatever reason, then we recommend you find a new host. This rarely happens, but it is not unknown.
Dedicated / Virtual Server / Premium Shared Hosting
While most hosts do not offer these on shared hosting, some exceptions exist, especially on the most expensive plans such as Business Hosting or Semi-dedicated hosting.
- Opcode: Alternative PHP Cache (APC Cache) - This caches the PHP code into RAM, and for a long time, was the PHP Opcode Cache of Choice. It is now used much less as it is no longer supported and will only work with PHP 5.4 and below. There are no plans to make it work with PHP 5.5. and 5.6.
- Opcode: eAccelerator - A not-so-common Opcode cache, but one you will see from time to time. Again, it will store compiled PHP scripts into shared memory and execute code from it, speeding up dynamic websites.
- Opcode: XCache - This is now the go-to Opcode cache of choice. It is well-supported, updated, and works with all versions of PHP. XCache has both a PHP Cache component that caches the PHP files directly into RAM and a Variable Cache component that works off the W3TAPI to cache the data that is subject to change. This is our recommended choice.
- Opcode: WinCache - This is an Opcode Cache for Windows servers.
- Memcached - Memcached is a distributed system often seen when web hosts have multiple server configurations. It speeds up dynamic web applications by reducing database load by storing chunks of data from the results of database calls.
Which WordPress versions are supported?
3.2 or higher.
Will the plugin interfere with other plugins or widgets?
Sometimes you can experience display issues caused by using the minification functionality. For this reason, I recommend using CloudFlare for minification.
Is this plugin compatible with other popular caching plugins?
You should uninstall any other caching solutions (not just disable them).

